Panning
Moving the image in a 2D view
If you wish to move the image in any of the 2D views, perhaps to centralise a feature of interest or to bring an area back into view following a zoom operation, you can do this by clicking the image with the LEFT mouse button held down then drag the image to required location.
Note that resetting the default zoom level or clicking the general Reset button on the toolbar will return the image to the default centralised position.
Scrolling
Scrolling through a sequence of 2D slices
Scrolling back or forward through the stack of 2D slices can be done in two ways.
1 – Scrolling using the mouse
Select scroll mode either from the control panel or by clicking the Scroll option from the pop-up menu. With the mouse over the desired 2D image, click and hold the MIDDLE mouse button. Keeping the button down, move the mouse vertically up or down to scroll through the slices.
2 – Scrolling using the keyboard
Use the up/down arrow keys on the keyboard to scroll through the 2D slices.
As you scroll back and forth through the slices the relevant horizontal slider control (see below) automatically updates its position.
Note – if you use a mouse with a scroll-wheel this may also be used to scroll through the slices in any of the 2D views. In this case it is not necessary to first select scroll mode. Just left-click on the desired 2D image then roll the wheel to scroll through the slices.
Scrolling using the control panel

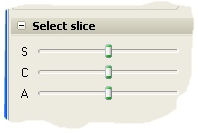
The horizontal slider controls on the control panel may also be used to scroll through slices in any of the 2D views. These controls may be used at any time – you do not need to select scroll mode as described above.
The topmost slider controls the top-right 2D view (normally sagittal), the middle slider controls the bottom-left 2D view (normally coronal) and the lower slider controls the bottom-right 2D view (normally axial).
Synchronisation
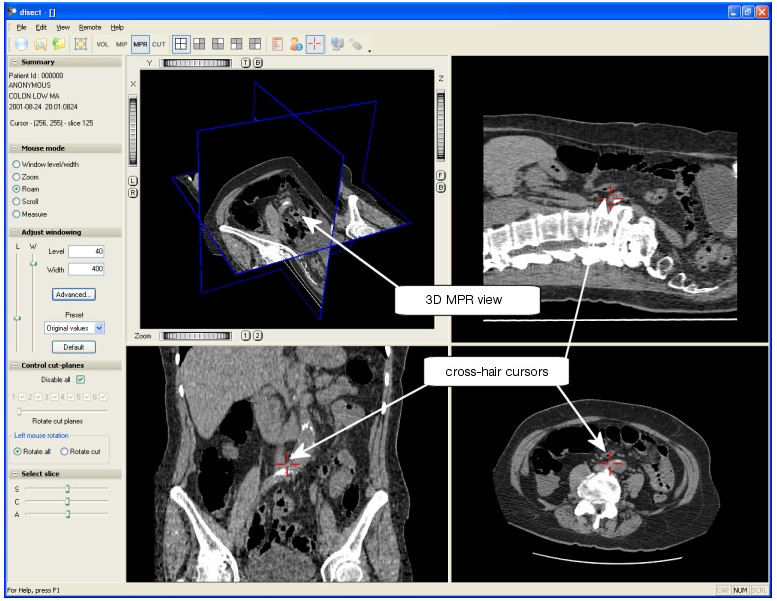
Any changes made to the slice displayed in a 2D view will always be synchronised with the position of the red coloured cross-hair on the other 2D views and with the location of the corresponding plane in the 3D MPR view if visible. The location of the cross-hair in the other 2D views corresponds to the location of the 2D slice on display in the view being effected. If the 3D MPR view is visible the location of the cross-hair corresponds to the apex where the 3 planes intersect.
Note that the cross-hairs may be displayed/hidden by clicking the relevant button on the toolbar or from the View Menu.
Roaming
What is roaming?
Roaming is a method of moving through the data in two or three dimensions interactively, while keeping all views synchronised.
In the 2D views the red cross-hair indicates the relative position of the other two 2D views. The 3D MPR view is also synchronised to the three cross-hairs so that the intersection of the three planes corresponds to the position of the cross-hairs. The screenshot below shows an example. Note that the red cross-hairs may be displayed/hidden by clicking the relevant button on the toolbar or from the View Menu.

Roaming using the mouse
To roam though any of the 2D views using the mouse select roam mode either from the control panel (as shown above) or from the right-click pop-up menu. Then click and hold the MIDDLE mouse button over one of the 2D images (the cross-hair will track the location of the mouse). Keeping the button pressed drag the cross-hair cursor around the 2D image and you will see that the other 2D images are automatically updated to match the new ‘target’ position. The 3D MPR view is also updated.
Flipping 2D Views
Why the need to flip?
Sometimes a 2D image will not be displayed in the expected orientation if the scanner was incorrectly set up. It may then be necessary to manually flip a view from left to right and/or from top to bottom.
How to flip a 2D view
1. Using the mouse right-click on the 2D view you wish to flip to open the pop-up menu.
2. From the menu choose Flip / Up Down or Flip / Left Right to alter the view.
3. To return to the default orientation, choose Flip / Reset to default.
The flipped view will stay in effect until it is changed or until the next time the same data set is loaded.